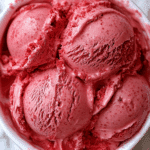
How to Make Red Velvet Ice Cream at Home

If you’ve ever craved a dessert that’s both visually stunning and decadently flavorful, you’re going to adore learning how to make Red Velvet Ice Cream at home. This luscious treat blends the classic red velvet cake’s rich cocoa notes with the creamy, cool indulgence of ice cream. From the vibrant color to the velvety smooth texture, this recipe is perfect for anyone who wants a homemade dessert that’s as delightful to eat as it is to share.
Why You’ll Love This Recipe
- Classic Flavor with a Twist: Combines the beloved taste of red velvet cake with creamy ice cream for a unique dessert experience.
- Beautifully Vibrant: The natural red hue makes it a stunning centerpiece for any occasion.
- Easy to Make at Home: Uses simple ingredients you probably already have, making it surprisingly accessible.
- Perfectly Balanced Sweetness: Sweet, tangy, and slightly chocolatey to satisfy every craving.
- Customizable Base: Easy to adapt with mix-ins or toppings to suit your taste.
Ingredients You’ll Need
This Red Velvet Ice Cream recipe relies on straightforward ingredients, each playing a vital role in creating richness, creaminess, and that signature color and flavor. You don’t need anything fancy, just quality basics to craft something extraordinary.
- Whole Milk: Provides a smooth, creamy base that keeps the ice cream from becoming too dense.
- Heavy Cream: Adds luscious richness and a silky texture essential for ice cream.
- Sugar: Balances the cocoa and cream, sweetening the ice cream perfectly.
- Cocoa Powder: The secret behind that subtle chocolate flavor that defines red velvet.
- Buttermilk: Adds a tangy depth reminiscent of classic red velvet cake.
- Vanilla Extract: Enhances the sweetness while rounding out the flavor profile.
- Red Food Coloring: Gives that iconic, eye-catching red that makes red velvet unforgettable.
- Cream Cheese: Adds a slight tang and creaminess to mimic cream cheese frosting flavor.
- Egg Yolks: For an extra velvety custard base that makes the ice cream rich and smooth.
Variations for Red Velvet Ice Cream
Feel free to personalize your homemade Red Velvet Ice Cream. This recipe is a great starting point, but you can easily tweak it to suit dietary needs, pantry availability, or flavor preferences without sacrificing that classic charm.
- Vegan Version: Substitute coconut milk and cashew cream for dairy, and use flax eggs instead of yolks.
- Chocolate Chunk Addition: Fold in small chunks of dark chocolate or red velvet cake crumbs for texture.
- Spiced Up: Add a pinch of cinnamon or nutmeg to add warmth and complexity.
- Berry Swirl: Mix in a raspberry or strawberry sauce swirl for a fruity contrast.
- Sugar-Free: Use natural sweeteners like erythritol or stevia blends to cut down on sugar.

How to Make Red Velvet Ice Cream
Step 1: Prepare the Custard Base
Start by warming the whole milk, heavy cream, and sugar together in a saucepan until the sugar dissolves and the mixture is hot but not boiling. Slowly whisk in beaten egg yolks to temper them, then cook gently until thickened into a rich custard.
Step 2: Add Buttermilk, Cocoa, and Flavorings
Remove the custard from heat and whisk in buttermilk, natural cocoa powder, vanilla extract, and cream cheese until smooth. This mixture creates the unmistakable flavor and richness that mimics red velvet cake.
Step 3: Color Your Ice Cream
Stir in red food coloring a little at a time until you get that vibrant, signature red hue. Don’t rush this step—adding color in increments helps achieve an even, bright shade.
Step 4: Chill the Mixture Thoroughly
Cover the custard and chill it in the fridge for at least 4 hours or overnight. This step enhances flavor melding and ensures the ice cream churns to a perfect consistency.
Step 5: Churn the Ice Cream
Pour the chilled base into your ice cream maker and churn according to the manufacturer’s instructions until thick and creamy. This process incorporates air for that perfect scoopable texture.
Step 6: Freeze and Set
Transfer the churned ice cream to an airtight container and freeze for at least 4 hours to fully set and firm up before serving.
Pro Tips for Making Red Velvet Ice Cream
- Use Quality Cocoa: A rich, unsweetened cocoa powder enhances the depth of the red velvet flavor dramatically.
- Chill the Custard Well: The colder your mix before churning, the smoother and creamier your ice cream will be.
- Don’t Overfill the Ice Cream Maker: Leave enough room for expansion to avoid icy texture.
- Balance the Color: Start with less food coloring to avoid overpowering bitterness from artificial dyes.
- Store Properly: Use airtight containers and press plastic wrap over the surface to prevent ice crystals during freezing.
How to Serve Red Velvet Ice Cream
Garnishes
Top your Red Velvet Ice Cream with a sprinkle of crushed red velvet cake crumbs, white chocolate shavings, or a drizzle of cream cheese frosting-inspired sauce to elevate flavors and add texture contrasts.
Side Dishes
This creamy delight pairs beautifully with chocolate brownies, fresh berries, or a warm waffle for a comforting dessert spread that complements its richness.
Creative Ways to Present
Serve scoops in elegant dessert glasses layered with layers of crushed cookies, or use it to fill ice cream sandwiches made with red velvet cookies for an indulgent twist.
Make Ahead and Storage
Storing Leftovers
Keep leftover Red Velvet Ice Cream in an airtight container in the coldest part of your freezer to maintain freshness and prevent ice crystals for up to two weeks.
Freezing
When freezing homemade ice cream, pack it tightly and press a layer of plastic wrap directly on the surface before sealing the lid to lock in moisture and texture.
Reheating
Unlike most foods, ice cream is best served cold, but if it’s too hard, let it sit at room temperature for a few minutes to soften or place it in the fridge briefly before scooping.
FAQs
Can I make Red Velvet Ice Cream without an ice cream maker?
Yes, you can use the freeze-and-stir method by freezing the mixture and stirring it every 30 minutes to break up ice crystals until smooth, though a machine yields the best texture.
Is it possible to make this recipe dairy-free?
Absolutely! Using coconut milk and cashew cream instead of dairy and a dairy-free cream cheese alternative will keep the richness while catering to dairy-free diets.
How do I get the perfect red color without overpowering artificial dyes?
Start with small amounts of food coloring and gradually add until you reach the desired shade; using natural beet juice powder is also a creative alternative.
Can I add mix-ins like nuts or fruit to Red Velvet Ice Cream?
Yes! Adding white chocolate chips, pecans, or even small chunks of red velvet cake during the last few minutes of churning makes the ice cream more complex and enjoyable.
How long can homemade Red Velvet Ice Cream be stored?
Stored properly in an airtight container, it maintains quality for up to two weeks in the freezer before flavor and texture start to decline.
Final Thoughts
This Red Velvet Ice Cream recipe is a wonderful way to enjoy a timeless flavor in a refreshing and creamy format. Whether you’re treating yourself or impressing guests, it’s a sweet celebration of comfort and indulgence rolled into one delicious scoop. Don’t hesitate to try it out—you’re going to love having this silky, rich delight ready anytime you crave something special.
Related Posts
- Why Chocolate Strawberry Ganache Tart Melts Hearts
- How to Make the Best Peach Upside-Down Cake
- Irresistible Peach Custard Dessert Recipes
Red Velvet Ice Cream
- Total Time: 8 hours 35 minutes
- Yield: About 1 quart (4 servings) 1x
- Diet: Gluten Free
Description
Red Velvet Ice Cream combines the beloved rich cocoa flavor and signature tang of classic red velvet cake with the creamy, smooth texture of homemade ice cream. This vibrant, luscious dessert is perfect for special occasions or everyday indulgence, offering a balanced sweetness with options for customization and dietary adaptations.
Ingredients
Dairy & Liquid Ingredients
- 2 cups Whole Milk
- 2 cups Heavy Cream
- 1 cup Buttermilk
- 1 teaspoon Vanilla Extract
Sweeteners & Flavorings
- 1 cup Sugar
- 2 tablespoons Unsweetened Cocoa Powder
- 3/4 teaspoon Red Food Coloring (adjust to desired intensity)
Custard Base
- 5 large Egg Yolks
- 4 ounces Cream Cheese, softened
Instructions
- Prepare the Custard Base: Warm the whole milk, heavy cream, and sugar together in a saucepan over medium heat until the sugar dissolves and the mixture is hot but not boiling. Gradually whisk the beaten egg yolks into the warm milk mixture to temper them, then cook gently, stirring constantly until the custard thickens enough to coat the back of a spoon.
- Add Buttermilk, Cocoa, and Flavorings: Remove the custard from heat and whisk in the buttermilk, cocoa powder, vanilla extract, and softened cream cheese until the mixture is smooth and fully combined, creating the classic rich red velvet flavor.
- Color Your Ice Cream: Slowly stir in the red food coloring a little at a time, mixing well between additions until the mixture reaches a vibrant, even red hue.
- Chill the Mixture Thoroughly: Cover the custard and refrigerate for at least 4 hours or overnight to allow the flavors to meld and ensure the mixture is cold before churning.
- Churn the Ice Cream: Pour the chilled base into an ice cream maker and churn according to the manufacturer’s instructions until it thickens to a creamy, scoopable consistency.
- Freeze and Set: Transfer the churned ice cream to an airtight container and freeze for at least 4 hours to fully set before serving.
Notes
- Use a rich, unsweetened cocoa powder to deepen the red velvet flavor.
- Chill the custard base thoroughly to ensure a smooth, creamy texture.
- Do not overfill your ice cream maker; leave enough room for expansion during churning.
- Add the red food coloring gradually to avoid a bitter taste and achieve the perfect shade.
- Store ice cream in an airtight container with plastic wrap pressed onto the surface to minimize ice crystals.
- Prep Time: 20 minutes
- Cook Time: 15 minutes
- Category: Dessert
- Method: Churning
- Cuisine: American
Nutrition
- Serving Size: 1/2 cup
- Calories: 280
- Sugar: 24g
- Sodium: 110mg
- Fat: 20g
- Saturated Fat: 12g
- Unsaturated Fat: 6g
- Trans Fat: 0g
- Carbohydrates: 25g
- Fiber: 1g
- Protein: 4g
- Cholesterol: 150mg
Keywords: red velvet ice cream, homemade ice cream, red velvet dessert, creamy ice cream, custard-based ice cream