Roasted Garlic Aioli
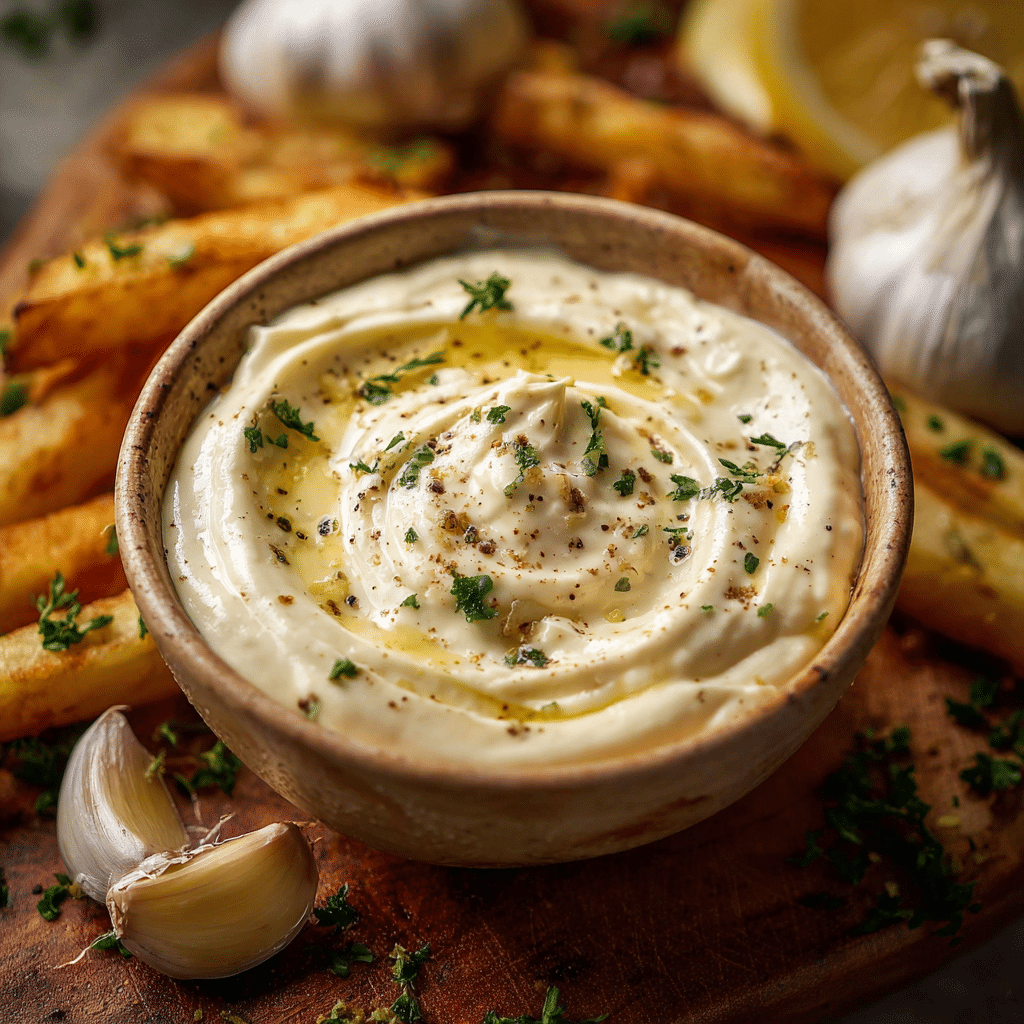
If you haven’t yet discovered the magic of Roasted Garlic Aioli, you’re in for a treat! This creamy, rich condiment combines the deep, mellow flavors of roasted garlic with the smooth texture of classic aioli, making it a versatile powerhouse in the kitchen. Whether you’re dipping crunchy fries, spreading it over sandwiches, or drizzling it on roasted veggies, Roasted Garlic Aioli brings dishes to life with a luxurious burst of flavor. Let’s dive into five creative ways to elevate your meals using this irresistible sauce.
Why You’ll Love This Recipe
- Depth of flavor: Roasting garlic mellows its sharpness, adding a sweet and nutty complexity to the aioli.
- Versatile use: Perfect for dipping, spreading, and even as a sauce base to boost any meal.
- Easy to customize: Simple ingredients allow you to tweak it to your taste or dietary needs effortlessly.
- Fresh and homemade: Brings freshness that store-bought aiolis just can’t match.
- Elevates everyday dishes: Adds gourmet flair to simple foods like fries or grilled chicken.
Ingredients You’ll Need
Creating Roasted Garlic Aioli is a breeze when you use fresh, essential ingredients that each play a critical role in flavor, texture, and color. Here’s what you need to bring this dreamy sauce to life.
- Garlic bulbs: Roasted until soft and caramelized to create that mellow, sweet garlic foundation.
- Mayonnaise: The creamy base providing smoothness and a subtle tang.
- Lemon juice: Adds brightness and balances the richness with a zesty kick.
- Olive oil: Enhances silkiness and gives a slight fruity touch.
- Salt and pepper: Essential seasonings to elevate and ground the flavors perfectly.
- Optional herbs: Fresh thyme or parsley can add a fresh, herbaceous layer.
Variations for Roasted Garlic Aioli
One of the best things about Roasted Garlic Aioli is how adaptable it is. Feel free to experiment and tailor it to your kitchen’s pantry or dietary preferences. It’s so easy to switch things up and still enjoy a delicious result.
- Vegan twist: Use vegan mayonnaise and swap olive oil for avocado oil for a dairy-free version.
- Spicy kick: Add a pinch of smoked paprika or cayenne pepper to spice things up.
- Herbal infusion: Fold in fresh basil, tarragon, or dill to complement different dishes.
- Lightened version: Replace half the mayo with Greek yogurt for tang and less fat.
- Umami boost: Stir in a touch of grated Parmesan or miso paste to deepen savory notes.

How to Make Roasted Garlic Aioli
Step 1: Roast the Garlic
Preheat your oven to 400°F (200°C). Slice the tops off a bulb of garlic to expose the cloves, drizzle with a little olive oil, wrap in foil, and roast for about 30-40 minutes until soft and golden brown. Let it cool before squeezing out the cloves.
Step 2: Blend the Ingredients
In a food processor or bowl, combine the roasted garlic cloves, mayonnaise, lemon juice, and olive oil. Blend or whisk until smooth, creamy, and fully combined. Season with salt and pepper to taste.
Step 3: Adjust and Customize
Taste your aioli and adjust the lemon juice or seasoning as needed. This is the perfect time to add herbs, spices, or any variations you prefer.
Step 4: Chill Before Serving
Cover and refrigerate the Roasted Garlic Aioli for at least an hour so the flavors meld beautifully. This chilling step makes the aioli taste even better!
Pro Tips for Making Roasted Garlic Aioli
- Use fresh garlic: Always roast fresh bulbs rather than pre-minced garlic to achieve a richer, sweeter flavor.
- Don’t rush roasting: Low and slow roasting caramelizes garlic without burning it, which is key for smooth aioli.
- Choose a good quality mayo: A rich, creamy mayonnaise will make all the difference in texture and flavor.
- Adjust lemon gradually: Add lemon juice little by little to strike a perfect balance between tangy and rich.
- Store properly: Keep your aioli in an airtight container to maintain its fresh flavor and texture.
How to Serve Roasted Garlic Aioli
Garnishes
Sprinkle freshly chopped herbs like parsley or chives on top of Roasted Garlic Aioli to enhance its visual appeal and add fresh bursts of flavor that complement its creamy richness.
Side Dishes
This aioli pairs wonderfully with crispy fries, roasted vegetables, grilled seafood, or as a spread on hearty sandwiches, amplifying every bite with its creamy, garlicky goodness.
Creative Ways to Present
Try dolloping Roasted Garlic Aioli on charcuterie boards alongside cured meats and cheeses or use it as a luscious dip for crudité platters for a beautiful and flavorful appetizer option.
Make Ahead and Storage
Storing Leftovers
Store leftover Roasted Garlic Aioli in a sealed container in the fridge for up to one week. The flavors actually deepen as it rests, making it perfect for meal prepping.
Freezing
Although you can freeze aioli, it may separate upon thawing due to the mayonnaise base, so we recommend using it fresh or refrigerated rather than frozen for best texture.
Reheating
Roasted Garlic Aioli is best served cold or at room temperature. If you want to warm it slightly, do so gently and briefly; overheating can break the emulsion and affect texture.
FAQs
What is the difference between aioli and mayonnaise?
Traditional aioli is an emulsified sauce with garlic and olive oil as its base, whereas mayonnaise uses egg yolks and a neutral oil; Roasted Garlic Aioli blends these elements, using mayo as a convenient base enhanced with roasted garlic flavor.
Can I make Roasted Garlic Aioli without a food processor?
Absolutely! You can mash the roasted garlic with a fork and whisk it thoroughly into the mayonnaise and lemon juice mixture for a slightly rustic but equally delicious aioli.
Is Roasted Garlic Aioli suitable for vegan diets?
The classic recipe uses mayonnaise that usually contains eggs, but you can easily make it vegan by swapping regular mayo for a plant-based version and using olive or avocado oil.
How long does Roasted Garlic Aioli last in the fridge?
Stored properly in an airtight container, it will stay fresh and flavorful for about 5 to 7 days.
What dishes pair best with Roasted Garlic Aioli?
It’s incredible with fries, grilled meats, roasted veggies, sandwiches, burgers, seafood, and even as a dip for baguette slices or crudités.
Final Thoughts
If you’re craving a simple way to add gourmet allure to everyday dishes, Roasted Garlic Aioli is your new best friend. Its rich, creamy texture and deeply satisfying garlic flavor make every bite something special. Give it a try and watch your meals transform from ordinary to unforgettable!
Related Posts
Print
Roasted Garlic Aioli
- Total Time: 45 minutes
- Yield: About 3/4 cup 1x
- Diet: Gluten Free
Description
Roasted Garlic Aioli is a creamy, rich condiment blending the mellow sweetness of roasted garlic with smooth mayonnaise, brightened by lemon juice and enhanced with olive oil. Perfect for dipping, spreading, or drizzling, this versatile sauce elevates fries, sandwiches, roasted vegetables, grilled meats, and more with its luxurious flavor.
Ingredients
Main Ingredients
- 1 large garlic bulb (roasted until soft and caramelized)
- 1/2 cup mayonnaise
- 1 tablespoon fresh lemon juice
- 2 tablespoons olive oil
- Salt, to taste
- Black pepper, to taste
Optional Ingredients
- Fresh thyme or parsley (for garnish or mixing in)
- Smoked paprika or cayenne pepper (for spicy kick)
- Fresh basil, tarragon, or dill (for herbal infusion)
- 1/4 cup Greek yogurt (to replace half mayo for lightened version)
- Grated Parmesan or miso paste (for umami boost)
Instructions
- Roast the Garlic: Preheat your oven to 400°F (200°C). Slice the top off the garlic bulb to expose the cloves. Drizzle with a little olive oil, wrap tightly in foil, and roast for 30-40 minutes until the cloves are soft and golden brown. Allow to cool before squeezing out the roasted garlic cloves.
- Blend the Ingredients: In a food processor or bowl, combine the roasted garlic cloves, mayonnaise, lemon juice, and olive oil. Blend or whisk until the mixture is smooth, creamy, and fully combined. Season with salt and pepper to taste.
- Adjust and Customize: Taste the aioli and adjust the lemon juice or seasoning as needed. Add any optional herbs, spices, or variations now to personalize your aioli.
- Chill Before Serving: Cover the aioli and refrigerate for at least one hour to allow flavors to meld and deepen. Serve cold or at room temperature.
Notes
- Use fresh garlic bulbs rather than pre-minced garlic for richer flavor.
- Roast garlic slowly to caramelize without burning, ensuring a smooth aioli.
- Choose a high-quality, creamy mayonnaise for best texture and taste.
- Add lemon juice gradually to balance tanginess and richness perfectly.
- Store aioli in an airtight container in the refrigerator to maintain freshness.
- Aioli can be made vegan by using plant-based mayonnaise and avocado oil instead of olive oil.
- Leftover aioli keeps well refrigerated for up to one week.
- Freezing is not recommended as the emulsion may separate upon thawing.
- Serve aioli chilled or gently warmed—avoid overheating to prevent texture breakdown.
- Prep Time: 10 minutes
- Cook Time: 35 minutes
- Category: Appetizers
- Method: Baking
- Cuisine: Mediterranean
Nutrition
- Serving Size: 1 tablespoon
- Calories: 90
- Sugar: 0.2g
- Sodium: 90mg
- Fat: 9g
- Saturated Fat: 1.3g
- Unsaturated Fat: 7g
- Trans Fat: 0g
- Carbohydrates: 0.4g
- Fiber: 0.1g
- Protein: 0.1g
- Cholesterol: 5mg
Keywords: Roasted Garlic Aioli, garlic sauce, aioli, condiment, dipping sauce, sandwich spread, roasted garlic, creamy sauce, easy aioli recipe, homemade aioli